3D wall panels installation doesn’t always have to be a daunting process. If you purchase precut panels all you need to do is make sure the substrate wall is flat and clean enough for the adhesive and follow a few simple steps.
Here’s a video where Vikki from Carperpenter’s Daughter Youtube Channel shows how she installed bamboo pulp 3D wall panels from ManoMano.
Here’s a transcript of the video where the wall panels installation starts :
So the first thing that I did was get the wall ready to glue the panels, and it really depends on the surface you’ve got, so I’ve got two totally different examples here. I’ve got painted breeze blocks, which wasn’t a completely level surface because it used to be a doorway, and some exposed bricks, that definitely were level, but I didn’t need to worry about when bricks joined, so I removed everything from the walls, and any loose surfaces I need to just chip away and fill them later. But I actually patch plastered the big chunks that were missing, but that’s a whole separate job so I leave a link to a video if you’ve got an uneven wall, but it just needs to be roughly level for this to work…
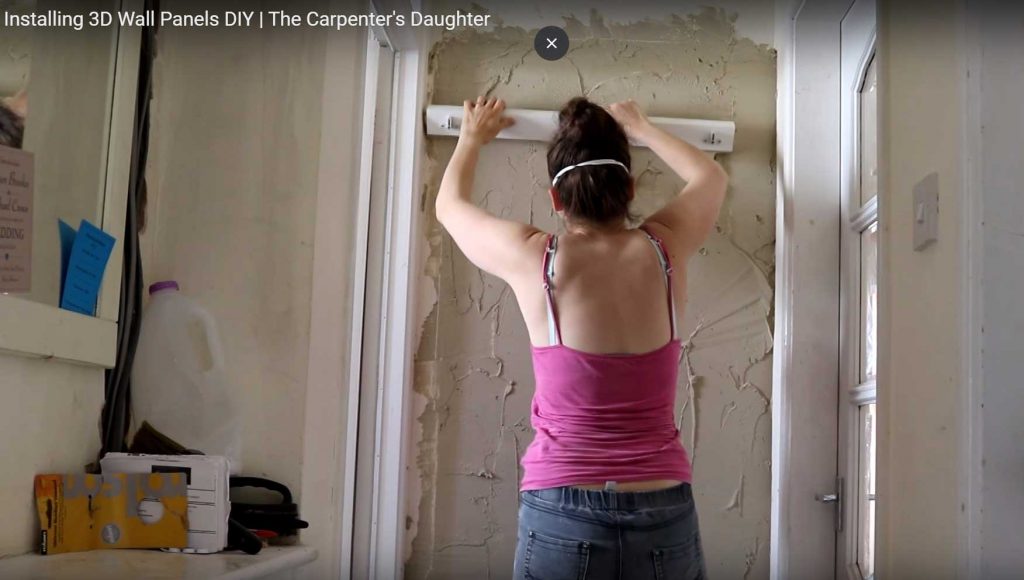
And I gave everything a wash with sugar soap. So once everything’s washed and dried, I don’t recommend skipping planning, where your panels are going to be. Now this space you see here, the panels didn’t quite fill the whole area, so originally I used some string to find the centerline to cut the panels in half, but eventually, I thought, you know what, I don’t need to do this I’m just going to use some trim, either end. And my spaces didn’t have skirting boards, so I use that to my benefit and I made sure when I installed them, they were completely level with a spirit level, so use that as a basis to make sure my tiles were completely straight from the bottom to the top, plus I knew I’d be left with a funny cut at the top, which would be less visible to the eye, and I could fill that with caulk later.
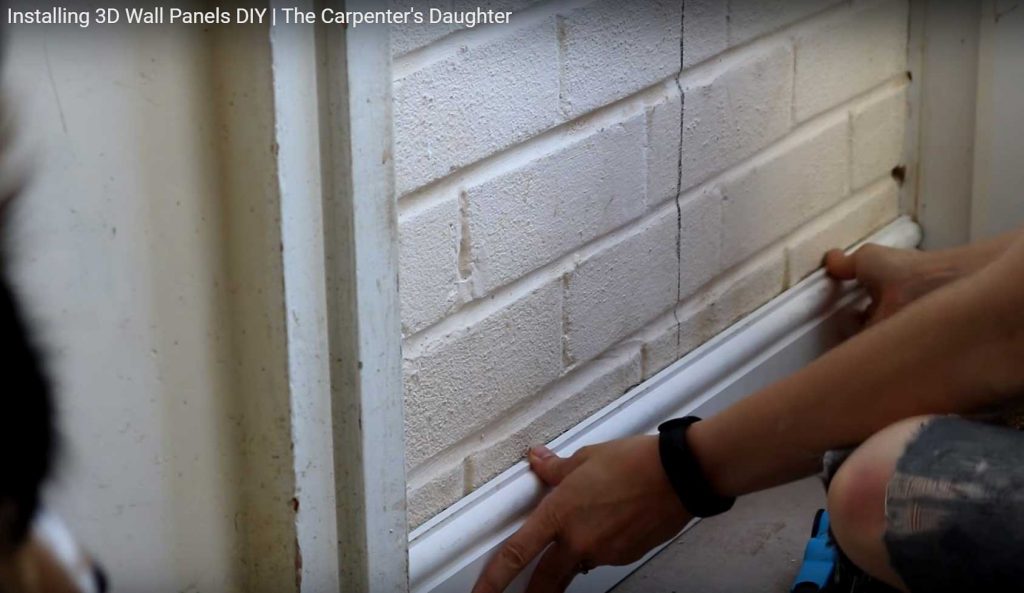
In the doorway, we had a bit of gap in either side and needed to make sure the tiles were absolutely dead center, and a big shout out to a company called Manomano who sent me these panels to review, they’re an online company that sells so many different products, not just these, but the 3d panels coming loads of different types and I went to the wavy version because I thought it would be easier to match up in an awkward space. Now for the fun part. You will need a lot of glue for this. I must have used about 12 tubes, for three strips of wall. But it also is going to depend on your wall surface. And by that I mean, you may have to glue the wall, and the panel separately for it to stick better. I actually found this brick more easy to glue compared to the freshly plastered wall, even though I had a PVA solution as well.
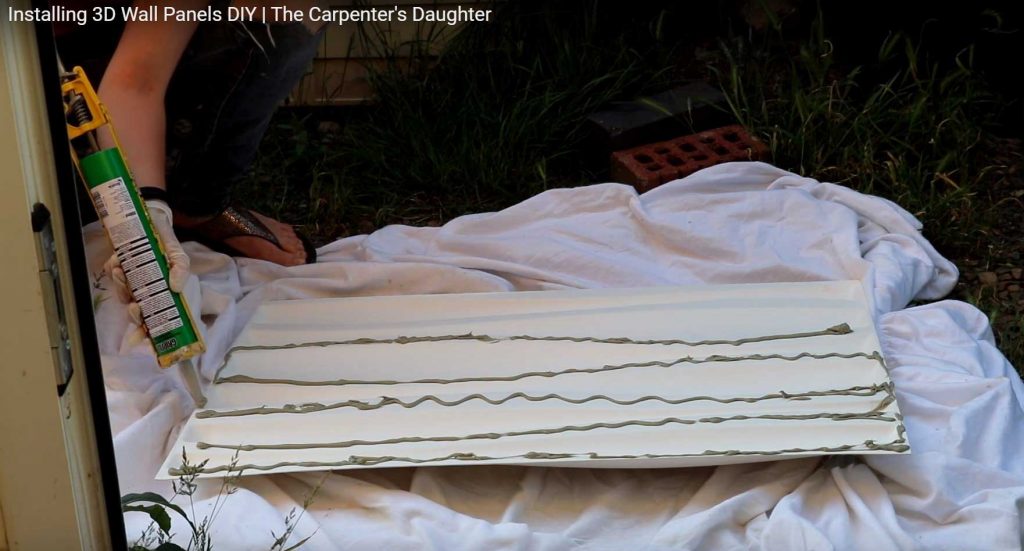
I just added a glue on the back of the panels on every bit that was pushed the wall, and just applied it in a zigzag fashion. Don’t worry I’ll leave all the links to the things I’m using below. And I did wear gloves with this just in case it stuck to me. And then just line to open and just press down with my hands going over every indent will make sure you’re rubbing off any excess glue as you go because unfortunately, it will show when you paint it later.
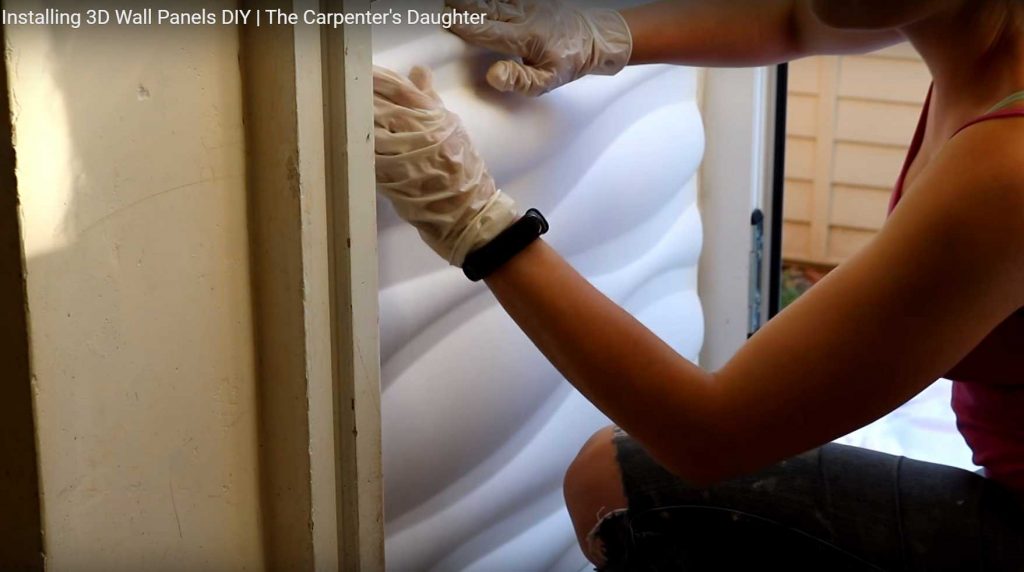
It is very easy to get glue on the gloves and accidentally get it on the panels, so make sure you’ve got plenty of cleaning wipes at hand as well. And I just repeated that until I got to the top where I got two tricky areas. Now, cutting them is really easy. It is actually made out of bamboo and it’s like a thin compressed card but is stronger than cardboard. So using a ruler I just measured where I roughly cut them through, drew a line using a spirit level, and I’m using spirit level because it was the longest thing I had. I used a sharp Stanley knife to slowly and carefully cut the pieces that I needed, and then like the rest just glued that into place. Then it was time for the trim, and have two different areas I needed before. So luckily there are so many different types of trims that you can buy. For the doorway, I use one that was roughly an inch wide, for the end of the wall I use one that was about six millimeters wide and using some more adhesive, I just glued these into place. But I have to say my favorite glue this project, was NoNails. By the time you get through so many bottles your hand is going to really hurt. And this one was so easy to apply. Now, I left a day for these whole panels to dry. And I’m going to start caulking these seams here.
I’ve got some decorators wipe, I’m just using white caulk, but I’m not going to caulk these trims here, because I think it would be better after I’ve painted these.
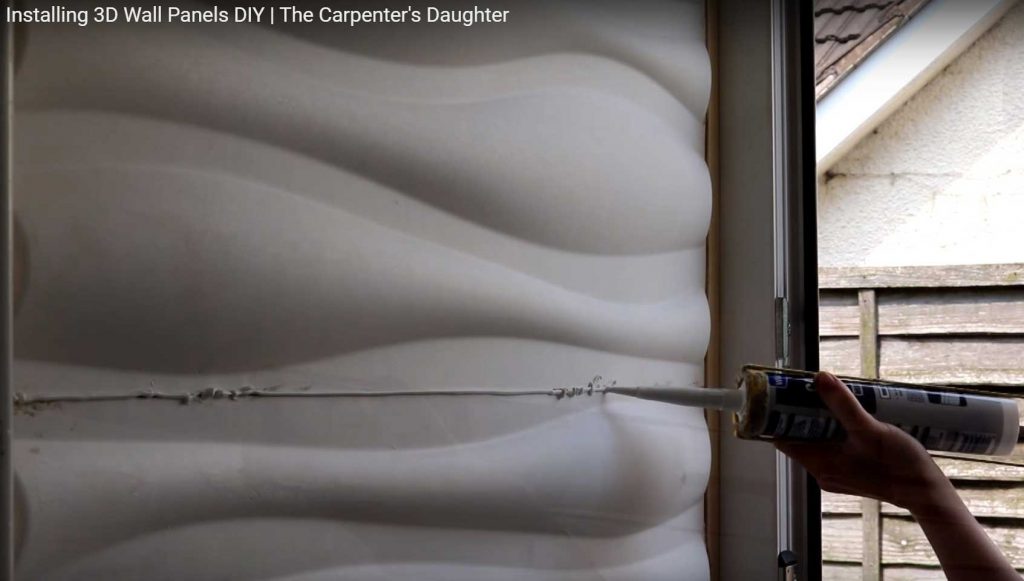
To get rid of any seams I use some white caulk in between the gaps, then white any excess off with a damp cloth. It did start to rub, like cardboard so I just took my time and went easy on them, just kept watching my finger to get over it, just so it could blend in and wasn’t visible. But because my bungalow is very small I really needed to paint with a bright color, and I went for Dulux’s easy care washable brilliant white, because we go for walks every morning and we’re very good at splashing mud everywhere. So this I couldn’t escape, but you can paint it with whatever color you want.
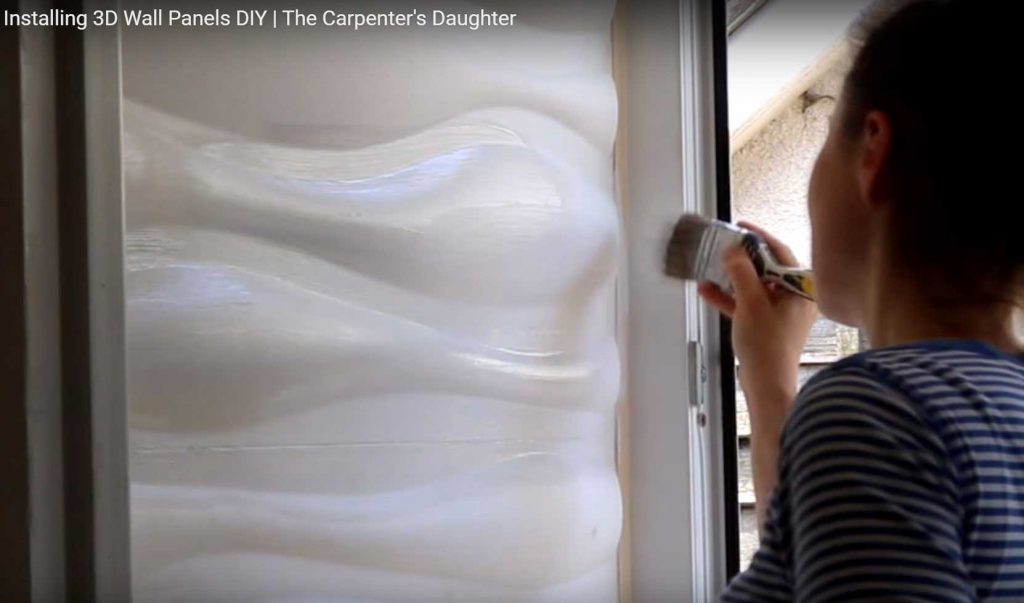
And actually painted the wooden trim with this as well. I know that’s not really the right thing to do, you’re best off using primer, but I wasn’t planning on touching the surfaces or couldn’t see the problem and then because this is actually the first time I used a color other than Magnolia on my walls, I did try and caulk right before I had a trim. For that I just don’t have the patience or skill. So once I’ve painted everything I painted the trim separately, glued it to the wall, wiped any excess glue, as I went and then caught the inside of the trim, not the outside which was touching the painted wall. So a huge thanks to my man after sending me these panels. Like I said before, this is absolutely not a sponsored video. It took a long time just to get all the finishing details around me because lots of got into place, couldn’t stop myself, I thought it looked great with a painter stealing kittens and I just went to town. So this is the happiest I’ve ever been in my hallway. And we’ve now got like a mini living room, going on just behind the camera as well…


